Mastering Injection Molding Parameters: Tuning Logic, Standard Values, and Defect Troubleshooting
Veteran molding technicians know a fundamental truth: Molds set the foundation, raw materials define the properties, but process parameters determine the yield rate.
Over 90% of common 射出成形 defects—such as sink marks, flash, bubbles, burn marks, weld lines, warpage, and ejector pin stress—are not caused by mold flaws. They are the result of an unbalanced parameter matrix. Many beginners rely on guesswork, blindly increasing pressure or temperature, which only creates new defects, extends cycle times, and wastes material.
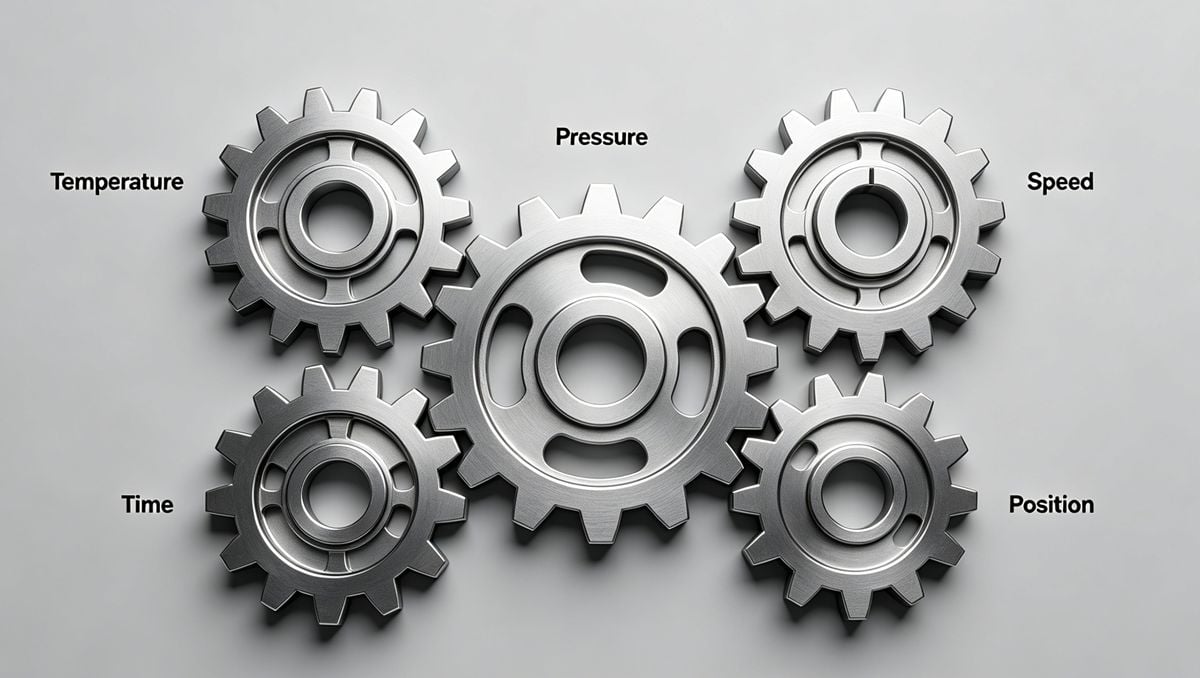
Scientific injection molding revolves around five core parameters: Temperature, Pressure, Speed, Time, and Position. Mastering the art of tuning is essentially the strategic orchestration of these five variables. Drawing on decades of shop floor experience, this guide breaks down the underlying logic, standard value ranges, tuning priorities, and troubleshooting strategies for each parameter.
1. Temperature: The Foundation of Plasticization
Temperature is the prerequisite for all other parameters. If the thermal profile is incorrect, adjusting pressure and speed will be futile. The core objective is to achieve uniform melting and optimal flow without thermal degradation or cold slugs. The temperature system comprises four pillars: barrel zones, nozzle, mold, and material drying.
Barrel Zone Temperatures
Barrel heating must follow a strict gradient profile (low-to-high) from the feed throat to the nozzle to prevent bridging and ensure uniform plasticization:
- Feed Throat (Rear Zone): Lowest temperature. Preheats the resin and prevents pellets from melting prematurely, which causes bridging and feed blockages.
- Compression Zone (Middle): The primary melting area where shear heat begins to plasticize the resin.
- Metering Zone (Front): Highest temperature. Ensures melt homogeneity and consistent viscosity, eliminating unmelted particles.
- Nozzle Zone: Slightly lower than the front zone to prevent drooling (salivation) and cold slugs entering the cavity.
Standard Temperature Ranges (General Reference):
- Commodity Plastics: ABS (180-220°C), PP (190-230°C), PE (170-210°C), PS (180-210°C)
- Engineering Plastics: PC (250-300°C), PA6 (220-260°C), PA66 (240-280°C), POM (180-210°C), PBT (220-260°C)
Tuning Tips: Increase front-zone temperature for thin-walled or long-flow parts to improve fill. For heat-sensitive resins (POM, PVC, flame-retardant ABS), strictly cap the temperature to prevent yellowing, gas generation, or brittleness. Glass-filled resins require slightly higher temperatures to ensure proper fiber-matrix fusion and prevent surface mottling.
Nozzle Temperature
The nozzle should be 10–20°C lower than the front barrel zone. Excessive heat causes drooling and black specks; insufficient heat leads to nozzle freezing, short shots, and interrupted flow.
金型温度
Mold temperature dictates cooling rates, surface finish, internal stress, and dimensional stability.
- Low Mold Temp (Chilled): Shorter cycle times, but higher internal stress, prominent weld lines, and potential warpage. Best for non-critical consumer goods.
- High Mold Temp (Heated): Slower cooling, superior surface gloss, minimized weld lines, and lower internal stress. Essential for optical lenses, precision gears, and aesthetic parts.
Rule of Thumb: High mold temp for aesthetics and precision; low mold temp for high-volume commodity parts.
Material Drying (The Overlooked Parameter)
Moisture turns to steam during melting, causing splay, bubbles, and hydrolysis.
- ABS: 70-80°C for 2-4 hours
- PC: 100-120°C for 4-6 hours
- PA/PA66: 90-110°C for 3-5 hours
- PBT: 120-140°C for 3 hours

2. Pressure: The Driving Force for Dimensional Accuracy
Pressure provides the mechanical force to move the melt. The four primary pressures must be distinctly understood and never confused.
射出圧力
Overcomes flow resistance to fill the cavity.
- Thin/Complex Parts: 120–160 bar
- Standard Parts: 80–120 bar
- Thick/Simple Parts: 60–90 bar Too low causes short shots; too high causes flash, excessive mold deflection, and extreme internal stress.
Holding (Packing) Pressure
Compensates for volumetric shrinkage as the melt cools. 80% of sink mark issues stem from poor holding pressure tuning.
- Standard Setting: 30%–70% of injection pressure.
- Thick Walls / Sink-Prone Areas: 50%–70%
- Thin Walls / Flash-Prone Areas: 30%–40% 警告だ: Excessive holding pressure causes ejector stress marks and part sticking; insufficient pressure leads to sink marks, voids, and undersized dimensions.
背圧
The resistance applied during screw recovery. It ensures melt homogeneity, color dispersion, and degassing.
- Standard: 5–15 bar
- Color Matching / Transparent Parts: 15–25 bar Too low causes air traps and mottling; too high causes shear overheating, material degradation, and excessive screw wear.
Clamping Force
Must be sufficient to resist cavity pressure. Insufficient force guarantees flash; excessive force damages mold parting lines and tie bars. Always calculate based on projected area.
3. Speed: Controlling Flow Dynamics and Aesthetics
While temperature and pressure set the baseline, speed dictates the aesthetic quality. Weld lines, jetting, and burn marks are almost always speed-related.
Multi-Stage Injection Speed (The Golden Rule)
Never use a single speed. Follow the "Slow → Fast → Slow → Cushion" rhythm:
- Gate Entry (Slow): Prevents jetting, gate blush, and cold slug injection.
- Cavity Fill (Medium-Fast): Rapidly fills the bulk of the part to prevent premature freezing and weld lines.
- End of Fill / Venting (Slow): Allows trapped air to escape, preventing burn marks and flash.
Recovery Speed
Pair with back pressure. High back pressure requires slower recovery to prevent shear burn; low back pressure allows medium recovery.
Ejector Speed
Always keep ejection slow and uniform. Fast ejection is the primary cause of stress whitening and part deformation.
4. Time: Solidifying the Process for Mass Production
Time parameters ensure repeatability and optimize cycle efficiency.
- Injection Time: Must match the injection speed profile. Too fast causes venting issues; too slow wastes cycle time.
- Holding Time: Must last until the gate freezes. プロのアドバイス Incrementally increase holding time until part weight stabilizes. That is your optimal holding time. Over-holding adds no value and wastes time.
- Cooling Time: Accounts for 60%+ of the cycle. Cool only as long as necessary to prevent ejection warpage. Do not over-cool thick parts unnecessarily.
5. Position: The Key to Precision Control
Position parameters act as the trigger points for transitioning between process phases. This is what separates basic operators from scientific molders.
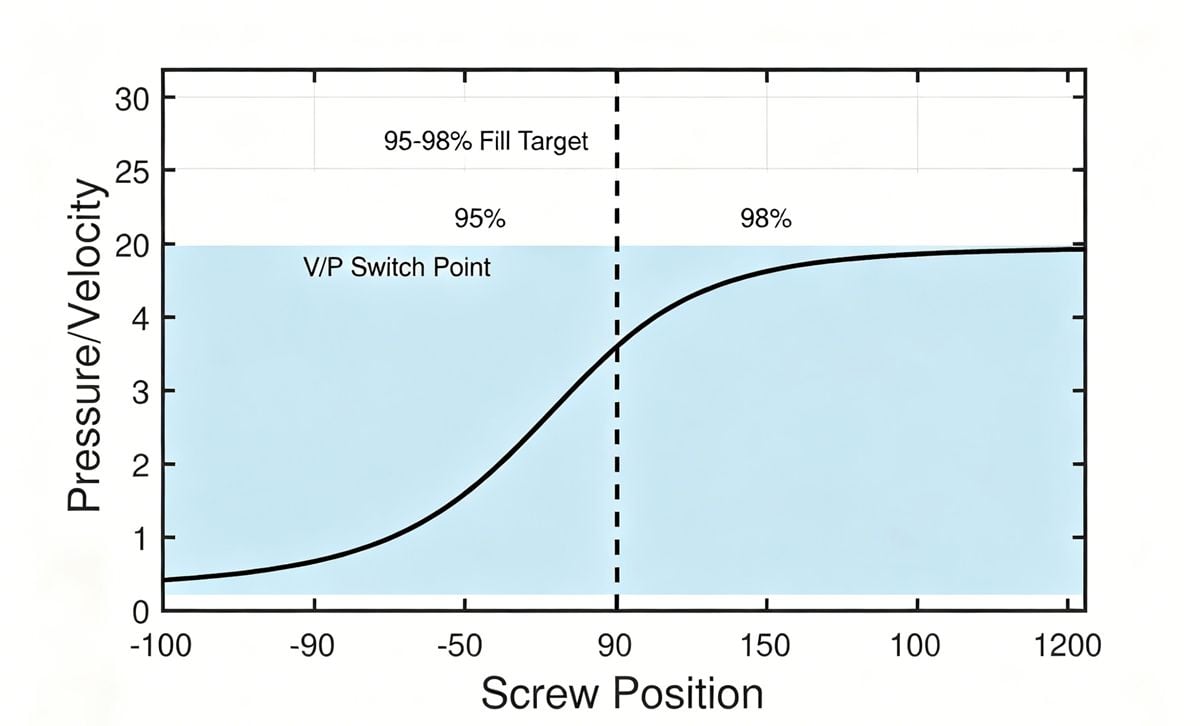
V/P Switch Point (Velocity-to-Pressure)
The most critical position parameter. It dictates when the machine transitions from speed-controlled filling to pressure-controlled packing.
- Switch Too Early: Cavity is underfilled → short shots and sink marks.
- Switch Too Late: Cavity is overpacked → flash, high internal stress, and parting line damage. Target: Switch when the cavity is 95%–98% full.
Shot Size (Recovery Position)
Determines the buffer/cushion size. A consistent cushion ensures shot-to-shot weight consistency.
The Scientific Tuning Hierarchy: A Master’s Checklist
When troubleshooting, follow this strict sequence to avoid creating new problems:
- Set Temperature First: Establish the plasticization baseline.
- Set Pressure Second: Ensure adequate fill and packing.
- Adjust Speed Third: Refine aesthetics and venting.
- Lock Time & Position Last: Solidify the process for repeatability.
Defect-Driven Troubleshooting Matrix
- Sink Marks / Voids / Dimensional Instability: Adjust holding pressure, cooling time, and mold temp.
- Flash: Reduce injection/holding pressure, slow down end-of-fill speed, or increase clamp force.
- Burn Marks / Splay / Bubbles: Adjust back pressure, optimize injection speed, improve venting, or verify material drying.
- Weld Lines: Increase melt/mold temperature or adjust injection speed profile.
- Ejector Stress / Warpage: Optimize cooling time, reduce holding pressure, and slow down ejection.
Final Golden Rule: Never make massive parameter swings in production. Adjust in micro-increments of 5%–10%, and allow 20–30 cycles to stabilize before evaluating the result.
True mastery in injection molding isn't about memorizing a universal parameter sheet. It’s about understanding material rheology, mold dynamics, and machine kinematics to build a robust, scientifically validated process.