Transparent plastic injection molding is notoriously challenging. Even minor fluctuations in temperature, pressure, or material moisture can lead to visible defects that compromise both aesthetics and structural integrity. Whether you're working with acrylic (PMMA), polycarbonate (PC), or PET, achieving optical clarity requires precision.
In this comprehensive guide, we break down the most common defects in transparent plastic molding, their root causes, and actionable solutions to help you optimize your production process.
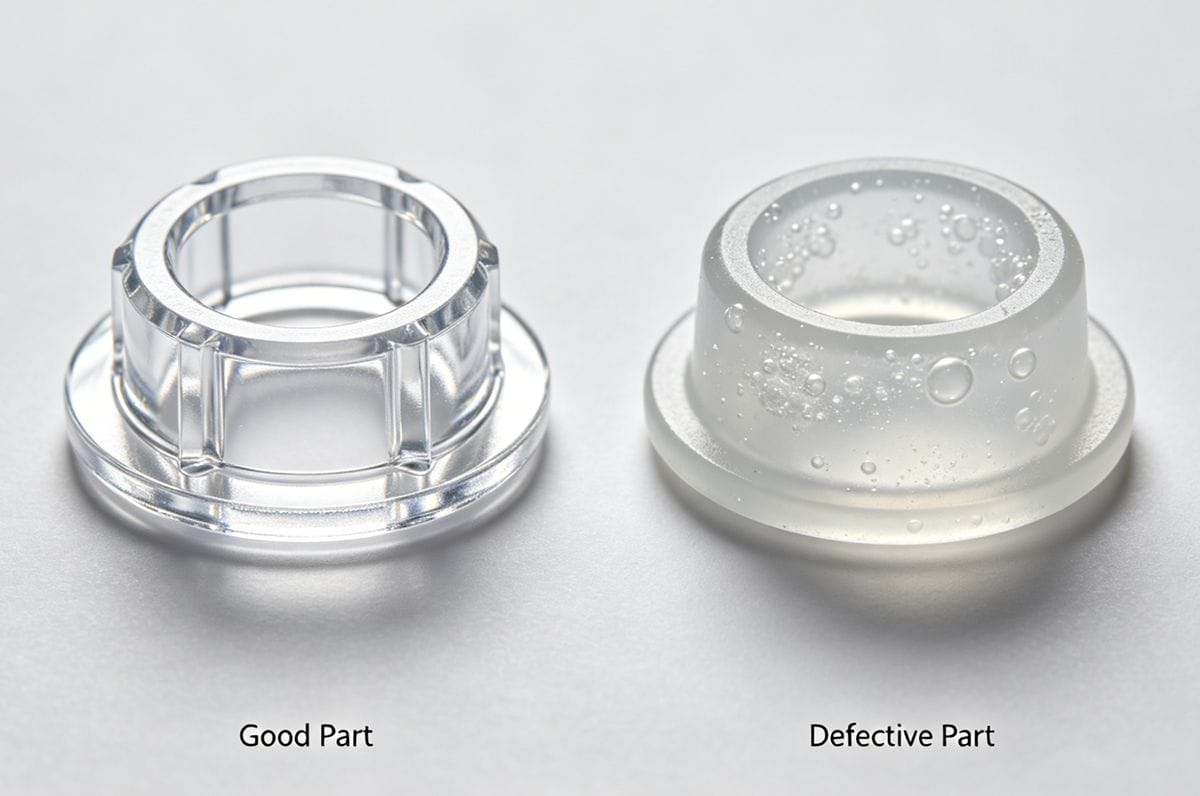
Bubbles and Voids
Bubbles and voids are trapped gases or shrinkage cavities inside the transparent part, severely ruining optical clarity. If you’re dealing with PC transparent parts specifically, check our dedicated guide: How to Eliminate Bubbles in PC Plastic Injection Molding
| Mögliche Ursache | Recommended Solution |
|---|---|
| Melt temperature too high | Reduce the molding temperature appropriately. |
| Injection pressure too low | Increase the injection pressure. |
| Boost (hold) time too short | Extend the boost time. |
| Holding pressure time too short | Extend the holding pressure time. |
| Mold temperature too low | Increase the mold temperature. |
| Poor material drying | Pre-dry the resin; increase drying temperature and time. |
| Blocked runners/channels | Thoroughly clean the flow channels. |
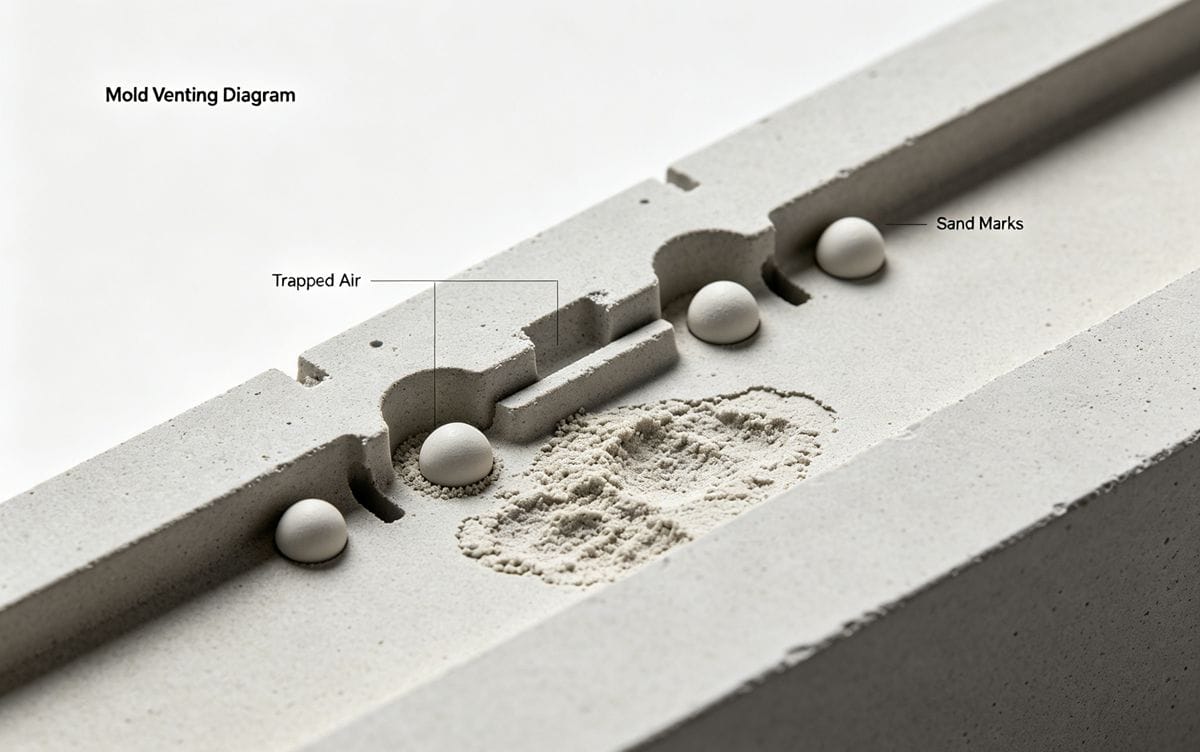
Blowholes and Sand Marks
These surface or subsurface imperfections often result from trapped air, moisture, or inadequate packing during the molding cycle.
- Contaminated Material: Remove foreign impurities from the raw material completely.
- Insufficient Injection Pressure: Increase the injection pressure.
- Low Screw Back Pressure: Increase the back pressure to improve melt homogeneity.
- Excessive Screw Speed: Reduce the screw rotation speed to prevent air entrapment.
- Poor Mold Venting: Add or enlarge venting channels in the mold.
- Insufficient Cooling Time: Extend the cooling time inside the mold.
Weld Lines and Flow Marks
Weld lines occur when two flow fronts meet but fail to fuse perfectly, creating a visible line or weakness in transparent parts.
| Mögliche Ursache | Recommended Solution |
|---|---|
| Melt temperature too low | Increase the molding temperature. |
| Injection pressure too low | Increase the injection pressure. |
| Insufficient material feed | Increase feed volume or use a larger injection machine. |
| Mold temperature too low | Increase the mold temperature. |
| Boost/Hold time too short | Extend both boost and holding pressure times. |
| Blocked gates/runners | Thoroughly clear any obstructions. |
| Poor mold venting | Add vents, reduce clamping force, or vent at the weld line. |
| Poor gating design | Redesign runner layout; relocate the gate. |
Cracks and Silver Streaks
Cracks and silver streaks (silvering) are often caused by material degradation, moisture, or excessive internal stress. Silver streaks are one of the most frequent optical flaws for clear resins; read our 4-factor diagnostic guide: Analyzing Silver Streaks in Injection Molding
- Excessive Melt Temperature: Lower the temperature and optimize the barrel temperature profile.
- Low Injection Pressure: Increase the injection pressure.
- Material Contamination: Eliminate foreign particles from the resin.
- Poor Material Drying: Increase drying temperature and extend drying time.
- Excessive Cycle Time: Shorten the molding cycle to reduce thermal degradation.
- Improper Screw Back Pressure: Adjust back pressure (either increase or decrease as needed).
- Poor Gating System Design: Check for blockages; optimize gate/runner layout and cross-sectional area.
Swirl Marks
Swirl marks appear as spiral patterns on the surface, usually caused by uneven flow or improper gating.
- Improper Melt Temperature: Adjust the temperature (either too high or too low can cause this).
- Excessive Material Feed: Reduce the shot size.
- Low Mold Temperature: Increase the mold temperature.
- Blocked Nozzle: Thoroughly clean the nozzle orifice.
- Improper Gate Location: Relocate the gate for smoother flow.
- Blocked Gates/Runners: Clear any obstructions in the flow path.
Black Spots and Streaks
Black spots indicate material degradation, usually caused by trapped resin, overheating, or contamination.
| Mögliche Ursache | Recommended Solution |
|---|---|
| Material contamination | Thoroughly clean the material hopper and barrel. |
| Improper barrel temperature | Adjust the barrel temperature (too high or too low). |
| Uneven barrel heating zones | Optimize the temperature profile across all zones. |
| Improper injection pressure | Adjust injection pressure to optimal levels. |
| Restricted flow system | Enlarge gate/runner size; clear any blockages. |
| Poor mold venting | Improve mold venting performance. |
| Hot spots / Dead corners | Remove dead corners in the barrel/nozzle; eliminate hot spots. |
Cloudiness and Haze
Cloudiness destroys the transparency of the part and is frequently linked to moisture or poor melt flow.
- Low Melt Temperature: Increase the molding temperature.
- Low Mold Temperature: Increase the mold temperature.
- Low Injection Pressure: Increase the injection pressure.
- Low Screw Back Pressure: Increase back pressure.
- Material Contamination: Clean thoroughly or switch to fresh resin.
- Uneven Barrel Heating: Adjust the temperature distribution across barrel zones.
- High Moisture/Volatiles: Pre-dry the material properly to remove moisture.
Poor Gloss and Rough Surface
A dull or rough surface finish indicates incomplete cavity replication or flow issues.
- Low Melt/Mold Temperature: Increase both melt and mold temperatures.
- Low Injection Pressure: Increase the injection pressure.
- Insufficient Feed: Increase the material feed volume.
- Improper Gate Location: Relocate the gate for better surface finish.
- Insufficient Cooling Time: Extend the cooling phase.
- Blocked Runners: Clear any obstructions.
- Poor Mold Polish: Polish the mold cavity to improve surface finish.
Sink Marks
Sink marks are depressions on the surface, typically occurring in thick sections due to uneven cooling or insufficient packing.
| Mögliche Ursache | Recommended Solution |
|---|---|
| Melt temperature too high | Reduce the molding temperature. |
| Injection pressure too low | Increase the injection pressure. |
| Mold temperature too high | Lower the mold temperature. |
| Insufficient material feed | Increase the feed volume. |
| Boost/Hold/Cooling time too short | Extend boost, holding, and cooling times. |
| Poor mold venting | Improve mold venting. |
| Blocked flow channels | Thoroughly clear the runners. |
Delamination and Peeling
Delamination occurs when layers of the plastic fail to bond, resulting in a flaky or peeling surface.
- Insufficient Feed: Increase feed volume or upgrade to a larger injection molding machine.
- Low Mold Temperature: Increase the mold temperature to improve layer bonding.
- Material Contamination: Remove impurities or replace with virgin material.
Final Thoughts on Transparent Injection Molding
Achieving flawless transparent plastic parts requires a holistic approach. Always start with proper material drying, ensure mold maintenance (venting and polishing), and fine-tune your temperature and pressure profiles. Keeping a detailed process log can help you quickly identify patterns when defects arise.
Working with optical-grade transparent plastics brings unique manufacturing hurdles we cover in a dedicated overview: Five Major Issues To Pay Attention To When Forming Transparent Injection Molded Parts
Have you encountered other challenges when molding transparent plastics? Share your experiences or questions in the form below!