Introduction: Understanding the Defect
Black spots and impurities are among the most critical factors contributing to scrap rates in moulage par injection de plastique1. These defects primarily ruin the aesthetic quality of the product, leading to rejection.

Typically, these imperfections appear as small, dark brown, non-reflective particles. Larger impurities may appear layered, brittle, and porous when crushed. To solve the problem, we must first understand their distribution:
- Random Distribution: Some spots are scattered throughout the entire part (indicating pre-molding contamination2).
- Localized Distribution: Some appear only in specific areas or on the surface (indicating issues during the molding process).
Key Insight: Impurities found deep inside the part existed avant molding. Impurities found only on the surface were likely introduced during molding.
Part 1: Root Cause Analysis
We can categorize the causes of black spots3 into two main phases: Pre-Molding et During Molding.
1. Pre-Molding Causes (Material & Handling)
These defects originate before the plastic even enters the mold cavity.
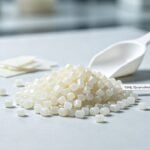
- Raw Material Issues: Impurities can stem from the manufacturing process, such as unclean processing, impure pelletizing, or mixing with incompatible materials (e.g., high melting point particles in low melting point resin).
- Contamination: During packaging, transportation, or storage, foreign objects can mix with the resin. If you observe foreign matter on the surface of the pellets immediately after opening the bag, this is the source.
- Recycled Material: Using crushed scrap (regrind) that contains dust, metal shavings, or degraded particles is a common culprit.
- Carbonization: Large black spots (1-2mm) are often chunks of carbonized material. This happens when plastic is trapped in a "dead spot" (like the screw tip or nozzle) for too long, overheats, degrades, and eventually breaks off into the melt stream.
- Additive Degradation: Certain additives (like antistatic agents or colorants) can be more chemically active than the base resin. They may decompose and turn black at temperatures where the base resin is still stable.
2. During Molding Causes (Machine & Mold)
These defects are generated by the equipment or the environment during the production cycle.
- Mold Wear: Poor quality mold steel can shed iron powder from parting lines or sliding surfaces. Rough ejector pins or sliding blocks can also generate metal dust.
- Lubrication & Rust: Rust or dirty grease from inside sliding blocks can be flung onto the product. Similarly, oil or water splashing onto the cavity surface can cause surface defects.
- Environmental Dust: Airborne dust and suspended particles in the factory can settle into the open mold or the hopper if not properly covered.
Part 2: Diagnostic & Solutions
Identifying the type of black spot helps determine the fix.
| Defect Characteristic | Likely Cause | Recommended Solution |
|---|---|---|
| Scattered throughout part (deep & surface) | Pre-molding contamination or Carbonization | Check raw material source; Clean screw and barrel; Check for dead spots. |
| Surface only (localized) | Mold issues or Environment | Clean mold surface; Check for rust/oil; Cover hopper; Improve workshop cleanliness. |
| Large spots (0.5 - 1mm) | Carbonized Material | Lower melt temperature; Reduce residence time; Clean nozzle and check for burnt material. |
| High density of spots after changeover | Incomplete purging | Increase back pressure during cleaning; Perform multiple purging cycles. |
Solutions for Carbonization (The "Burnt" Material)
Carbonization is often due to excessive heat or material stagnation.
- Contrôle de la température : Ensure the displayed temperature matches the actual melt temperature. High back pressure and long cycle times can increase actual heat even if the setpoint is normal.
- Eliminate Dead Spots: Inspect the nozzle, screw tip, and flow channels. Any area where plastic can stagnate will eventually burn and create black specks.
- Check Clearances: Excessive clearance between the screw and the barrel allows material to get trapped and degrade over time.
Solutions for Mold & Mechanical Issues
- Maintenance : Regularly inspect sliding blocks, ejector pins, and cores. If they show signs of galling or burning, repair them immediately.
- Lubrication: Reduce friction by applying appropriate lubrication to sliding parts, but ensure no excess grease enters the cavity.
- Speed Control: Reduce the speed of mold opening/closing and slider movement to minimize friction and wear.
- Cleaning: Remove rust and debris from water channels and slider interiors. Tighten water nozzles to prevent leaks.
Part 3: The Cleaning Process
When switching materials or colors, or when black spots appear, a thorough cleaning (purging) of the injection unit is required.
- Method: Perform "Air Shooting" (purging without a mold). Melt the plastic, inject it into the air, and repeat.
- Technique: For stubborn carbonized deposits, use a high back pressure. This increases the shear force between the melt and the screw, effectively scrubbing the barrel walls.
- Goal: Continue until the purged material is completely clean and free of black specks.
Conseil de pro : If you suspect the raw material itself is the issue, perform a "virgin material test." Run a cycle with brand new, clean resin. If the black spots disappear, the issue was your material or regrind. If they persist, the issue is likely the machine or mold.
Explore this resource to discover essential practices that enhance quality and reduce defects in plastic injection molding. ↩
Learning about pre-molding contamination can help identify and eliminate sources of defects. ↩
Understanding the causes of black spots can help improve product quality and reduce scrap rates. ↩