

Sink marks are one of the most common and frustrating defects in injection molding. If you’ve ever noticed a localized depression or micro-dimple on the surface of a plastic part, you’re dealing with sink marks.
While often considered a cosmetic issue, severe sink marks can indicate structural weaknesses and residual stresses. In this comprehensive guide, we’ll break down why sink marks occur, how material selection plays a role, and actionable strategies to fix them.
What Exactly is a Sink Mark?
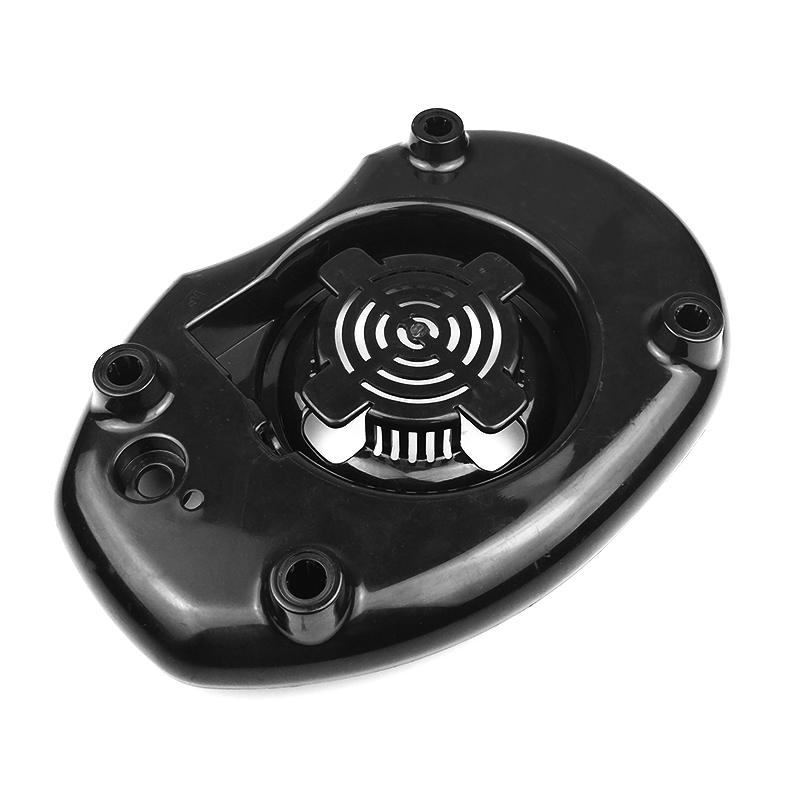
Sink marks are localized depressions that occur when the interior of a thick plastic section shrinks more than the exterior. They typically appear in areas where the wall thickness increases, such as behind ribs, bosses, or near external corners.
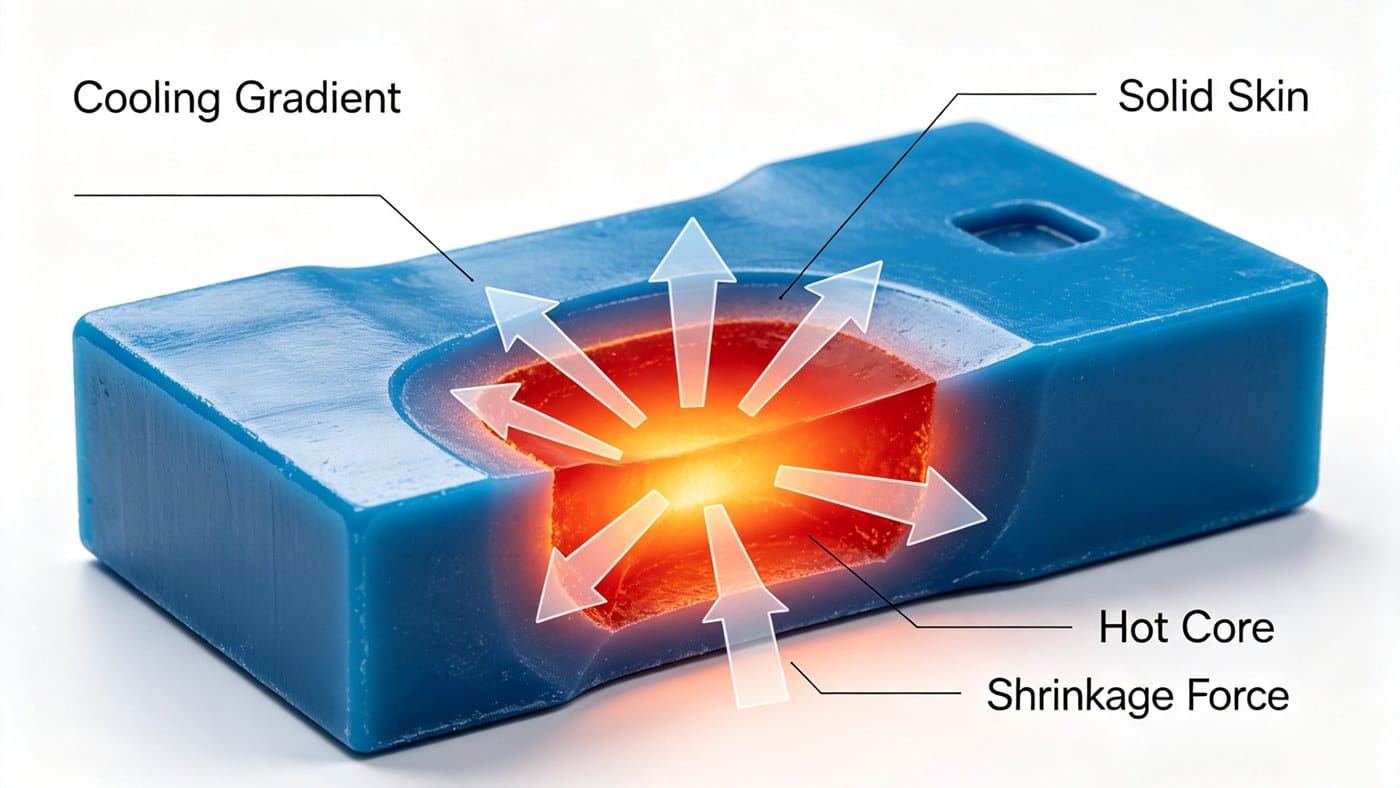
The fundamental cause is differential cooling and shrinkage. Thermoplastics have a high coefficient of thermal expansion. As the molten plastic cools inside the mold, it shrinks. If the core of a thick section remains molten and hot while the outer skin has already solidified, the cooling core will pull the semi-solid surface inward, creating a dent. For a full breakdown of root causes and mold-level fixes, read our dedicated troubleshooting guide: Troubleshooting Injection Molding Sink Marks: Causes & Solutions.
The Science Behind the Defect: Why Does It Happen?
To fix sink marks, you must understand the thermodynamics of the mold cavity.
- Cooling Rate Differences: Thin sections and sharp corners cool and solidify rapidly because they have maximum contact with the cold mold walls.
- The "Hot Core" Effect: The center of thick sections is furthest from the cooling channels. It retains heat the longest and is the last area to solidify.
- The Pulling Force: As the hot core finally cools and shrinks, it lacks sufficient molten material to compensate for the volume loss. It pulls inward on the already rigid outer skin, causing the sink mark.
How Material Selection Impacts Shrinkage
Not all plastics are created equal. The base resin you choose dictates how aggressively your part will shrink.
| Type de matériau | Taux de rétrécissement | Sink Mark Risk | Exemples |
|---|---|---|---|
| Semi-Crystalline | High (1.5% - 3.0%) | 🔴 Very High | PP, PE, PA (Nylon), POM |
| Amorphous | Low (0.4% - 0.7%) | 🟢 Low | ABS, PC, PS, PMMA |
| Filled/Reinforced | Very Low (0.1% - 0.5%) | 🟢 Very Low | Glass-filled Nylon, Mineral-filled PP |
Pro Tip: If you are designing a part prone to sink marks and have material flexibility, switching from a semi-crystalline resin to an amorphous or glass-filled alternative can drastically reduce shrinkage. To learn more about resin shrinkage characteristics that drive sink formation, check our article: Injection Molding Shrinkage: How Temperature & Speed Affect Quality.
Process & Design Solutions to Eliminate Sink Marks
Fixing sink marks usually requires a combination of design adjustments, process tuning, and mold modifications.
1. Optimize Part Design (The Best Prevention)
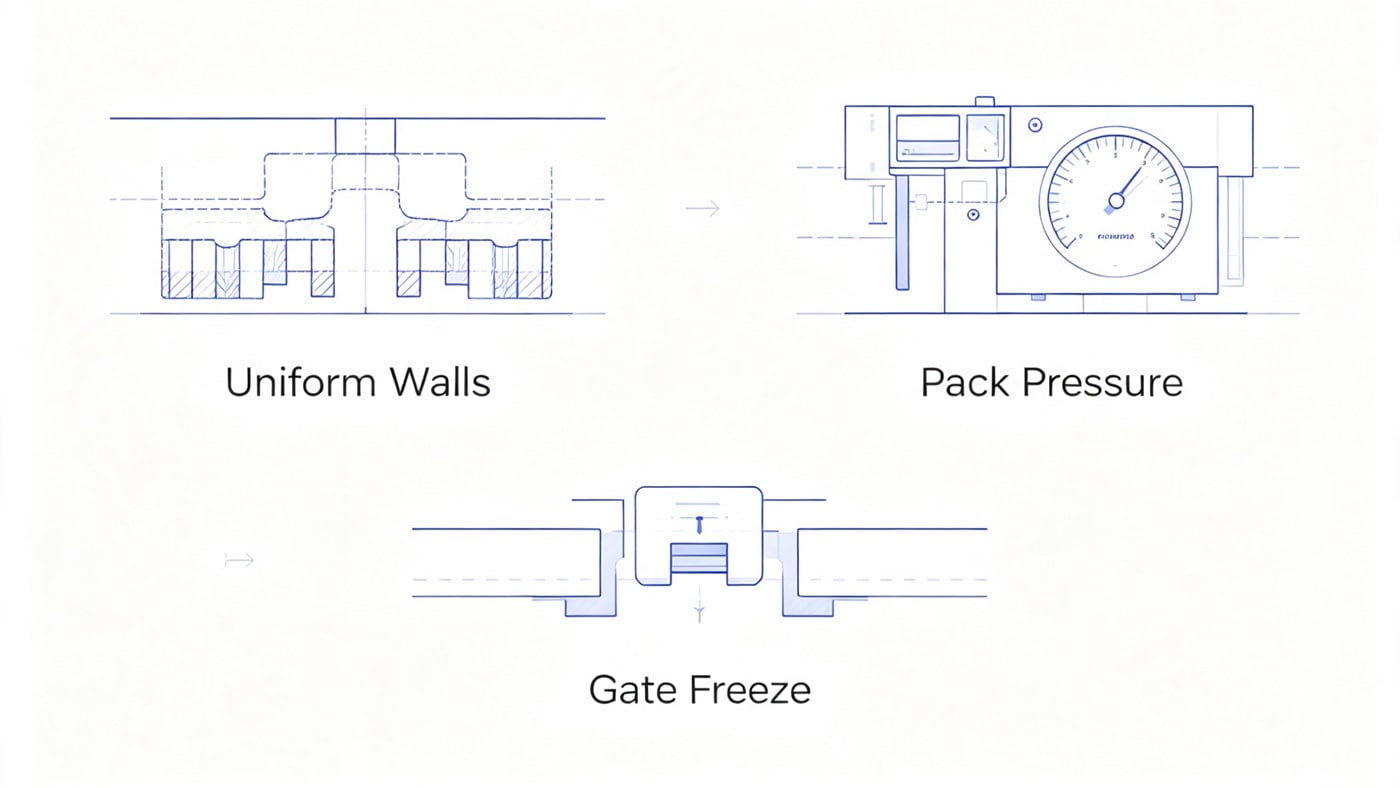
- Maintain Uniform Wall Thickness: This is the golden rule of injection molding. Avoid sudden transitions.
- Core Out Thick Sections: If a thick boss or rib is necessary, hollow it out to reduce the overall mass.
- Rib Thickness Guidelines: Ribs should generally be no thicker than 50% to 60% of the adjacent nominal wall thickness.
2. Fine-Tune the Injection Process
If the design is locked, you can try adjusting the molding parameters:
- Increase Packing/Holding Pressure: This forces more material into the cavity to compensate for volumetric shrinkage.
- Extend Packing Time: Crucial Note: The packing pressure is only effective as long as the gate remains open (molten). If your gate freezes off too early, extending pack time will do absolutely nothing. You may need to increase nozzle/mold temperature or gate size to keep the gate open longer.
- Optimize Cooling: Ensure cooling is as uniform as possible. Faster overall cooling reduces the time window for shrinkage.
Nearly all common molding defects including sink marks can be resolved with calibrated machine parameters; see our full parameter tuning guide for step-by-step adjustments: Injection Molding Parameters Tuning Guide.
The Hidden Danger: Residual Stress
Don't ignore sink marks just because they look bad. A sink mark is a physical manifestation of uneven shrinkage. This differential shrinkage creates internal residual stresses within the polymer matrix.
These hidden stresses can lead to:
- Reduced impact strength (the part becomes brittle).
- Lower heat deflection temperature.
- Premature failure under load or chemical exposure.
- Post-molding warpage.
Réflexions finales
Eliminating sink marks requires a holistic approach. Always start with good part design—uniform walls and properly sized ribs. When issues arise, analyze your material's shrinkage rate and ensure your packing phase is actually reaching the cavity before the gate freezes.
Are you still struggling with surface defects on your injection molding parts? Drop a comment below or contact our engineering team for a free design-for-manufacturability (DFM) review!



 English
 French
 Dutch
Dutch German
 Japanese
 Korean