Introduction: Why Wall Thickness Matters in Plastic Part Manufacturing
The wall thickness of plastic parts plays a critical role in determining the final quality, performance, and manufacturability of injection-molded components. Whether you're designing consumer electronics, automotive parts, or household appliances, understanding how wall thickness affects your product can save you time, money, and prevent costly manufacturing defects.
In this comprehensive guide, we'll explore the impact of wall thickness on plastic part quality, industry best practices, and practical design recommendations that will help you optimize your next injection molding project.
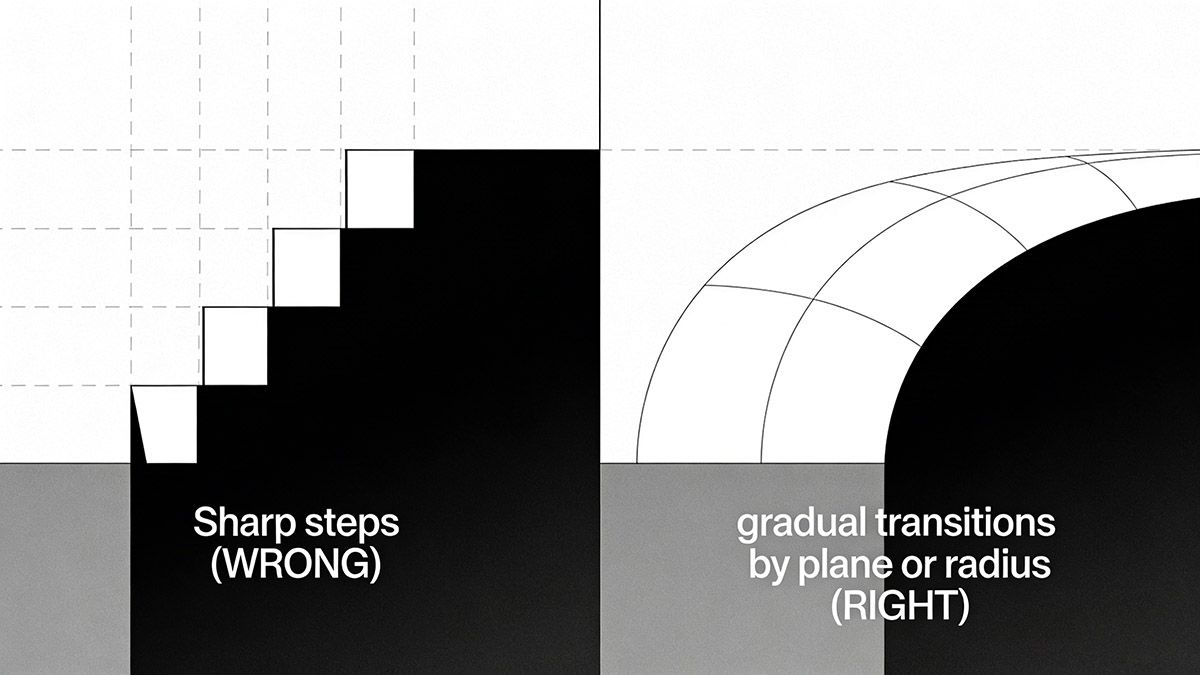
Figure 1: Correct vs. Incorrect Wall Thickness Transitions - Sharp steps (WRONG) vs. gradual transitions by plane or radius (RIGHT)
The Critical Impact of Wall Thickness on Plastic Part Quality
When Wall Thickness is Too Thin
Insufficient wall thickness creates significant challenges during the injection molding process:
- High Flow Resistance: Molten plastic struggles to fill complex cavities
- Incomplete Filling: Large or intricate parts may not fully form
- Structural Weakness: Parts lack necessary strength and rigidity
- Ejection Problems: Components may break during demolding due to insufficient structural integrity
Minimum Wall Thickness Requirements
Your plastic part's minimum wall thickness must satisfy several critical criteria:
- Sufficient Strength and Rigidity for intended application
- Resistance to Ejection Forces - withstanding impact and vibration from ejection mechanisms
- Assembly Durability - capable of handling fastening forces during assembly
Conseil de pro: Different plastic materials have varying minimum wall thickness requirements based on their flow characteristics and mechanical properties.
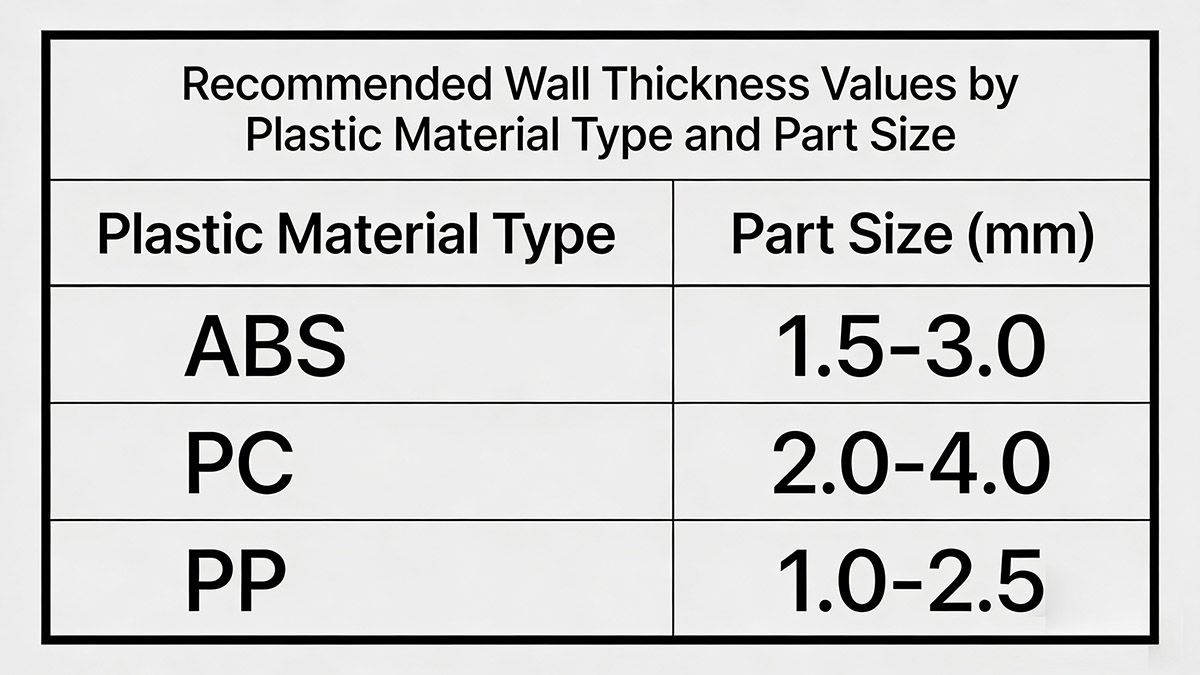 Figure 2: Recommended Wall Thickness Values by Plastic Material Type and Part Size
The Problems with Excessive Wall Thickness
While thin walls create filling issues, overly thick walls introduce different challenges:
Material Waste and Cost Implications1
- Unnecessary raw material consumption increases production costs
- Higher material usage without proportional performance benefits
Extended Cycle Times
- Thermoset Plastics: Increased molding time and risk of incomplete curing
- Thermoplastic Materials: Longer cooling periods reduce production efficiency
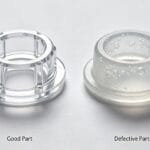
Quality Defects
- Non-uniform cooling rates create internal stresses
- Potential warpage and dimensional instability
- Sink marks and surface imperfections
Key Design Principles for Optimal Wall Thickness
1. Maintain Uniform Wall Thickness
Best Practice: Keep wall thickness as consistent as possible throughout your part design.
Why It Matters:
- Uniform cooling prevents differential shrinkage
- Reduces internal stresses and warpage
- Improves overall part quality and dimensional stability
2. Smooth Transitions for Necessary Thickness Changes2
When wall thickness variations are unavoidable:
✅ DO: Use gradual transitions or radiused corners
❌ DON'T: Create sharp steps or abrupt changes
Consequences of Poor Transitions:
- Uneven shrinkage leading to part deformation
- Reduced structural strength at transition points
- Flow restrictions during injection molding
3. Industry Standard Wall Thickness Ranges
| Application Type | Typical Wall Thickness |
|---|---|
| General Purpose | 1-5 mm |
| Most Common Range | 2-3 mm |
| Small Appliances (e.g., Irons) | ~2 mm |
| Larger Equipment (e.g., Vacuum Cleaners) | ~2.5 mm |
4. Rib and Boss Design Guidelines3
Critical Recommendation: Design ribs and screw bosses at approximately 50% of the main wall thickness.
Benefits:
- Prevents sink marks on visible surfaces
- Maintains structural support without excessive material
- Ensures uniform cooling rates
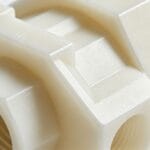
5. Avoid Large Flat Surfaces
Design Warning: Minimize large, unsupported flat areas in your part design.
Exception: Very small dimensions may be acceptable depending on material and application requirements.
Risk Factors:
- Warpage due to uneven cooling
- Dimensional instability during use
- Aesthetic defects affecting product appearance
Considérations spécifiques aux matériaux4
Different plastic materials require specific wall thickness approaches:
| Matériau | Minimum Wall (mm) | Petites pièces | Pièces moyennes | Grandes pièces |
|---|---|---|---|---|
| PS | 1.0 | 1.5 | 2-2.5 | 3-4 |
| ABS | 1.0 | 1.5 | 2-2.5 | 3-4 |
| PP | 0.8 | 1.5 | 2-2.5 | 2.5-3.5 |
| PE | 0.8 | 1.2 | 1.6 | 2.5-3.5 |
| PC | 1.0 | 1.8 | 2.5 | 3-4.5 |
| POM | 1.0 | 1.5 | 1.6 | 3-5 |
| PMMA | 1.0 | 1.5 | 2.5 | 4-6.5 |
Table 1: Recommended wall thickness values by material type and part size category
Practical Design Checklist for Optimal Wall Thickness
Before finalizing your plastic part design, verify these key points:
- Wall thickness falls within 1-5mm range (ideally 2-3mm)
- Thickness remains as uniform as possible
- Any necessary transitions use gradual slopes or radii
- Ribs and bosses are 50% of main wall thickness
- No large unsupported flat surfaces
- Material selection matches thickness requirements
- Design accounts for ejection and assembly forces
Conclusion: Balancing Performance, Cost, and Manufacturability
Optimizing wall thickness in plastic part design requires balancing multiple factors: structural performance, manufacturing efficiency, material costs, and aesthetic quality. By following industry best practices and understanding the relationship between wall thickness and part quality, you can create designs that excel in both performance and producibility.
Key Takeaway: There's no one-size-fits-all solution for wall thickness. Your optimal design depends on material selection, part geometry, functional requirements, and manufacturing constraints. Work closely with your injection molding partner to determine the ideal wall thickness for your specific application.
Discover how to minimize material waste and reduce costs in your manufacturing process. ↩
Explore the importance of smooth transitions to prevent defects in your designs. ↩
Understanding rib and boss design can enhance structural integrity and reduce defects. ↩
Explore material-specific considerations to optimize your designs for different plastics. ↩