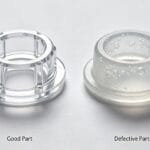
Kurze Schüsse (auch bekannt als Unterfüllungen) treten auf, wenn der geschmolzene Kunststoff den Formhohlraum nicht vollständig ausfüllt, was zu einem unvollständigen Teil führt. Dieser Fehler tritt typischerweise in dünnwandigen Abschnitten oder in Bereichen auf, die am weitesten vom Anschnitt entfernt sind.
Profi-Tipp: Bei internen Merkmalen, die weder die Ästhetik noch die Funktionalität beeinträchtigen, können kleinere Fehlschüsse akzeptabel sein. Der Versuch, diese durch übermäßiges Packen zu beheben, kann jedoch dazu führen, dass Flash (überschüssiges Material läuft aus). Prüfen Sie daher immer zuerst, ob die Anpassung notwendig ist.
Kurze Schüsse werden durch eine Vielzahl von Faktoren verursacht, die von den Maschineneinstellungen bis zum Design der Form reichen. Nachfolgend finden Sie die Die 12 effektivsten Strategien um diesen häufigen Defekt zu diagnostizieren und zu beheben.
1. Unzureichende Schussgröße oder Polsterung
Wenn die eingespritzte Materialmenge geringer ist als der Bedarf der Kavität, wird das Teil nicht gefüllt.
- Lösung: Erhöhen Sie allmählich die Schussgröße oder den Kissenwert, bis das Teil vollständig gefüllt ist, ohne dass ein Grat entsteht.
2. Fass-Temperatur zu niedrig
Niedrige Schmelztemperaturen erhöhen die Viskosität des Kunststoffs und erzeugen einen hohen Widerstand beim Fließen.
- Lösung: Erhöhen Sie die Temperaturzonen des Fasses entsprechend. Dies verringert die Viskosität und verbessert die Fließfähigkeit der Schmelze, so dass sie auch entlegene Bereiche der Form erreichen kann.
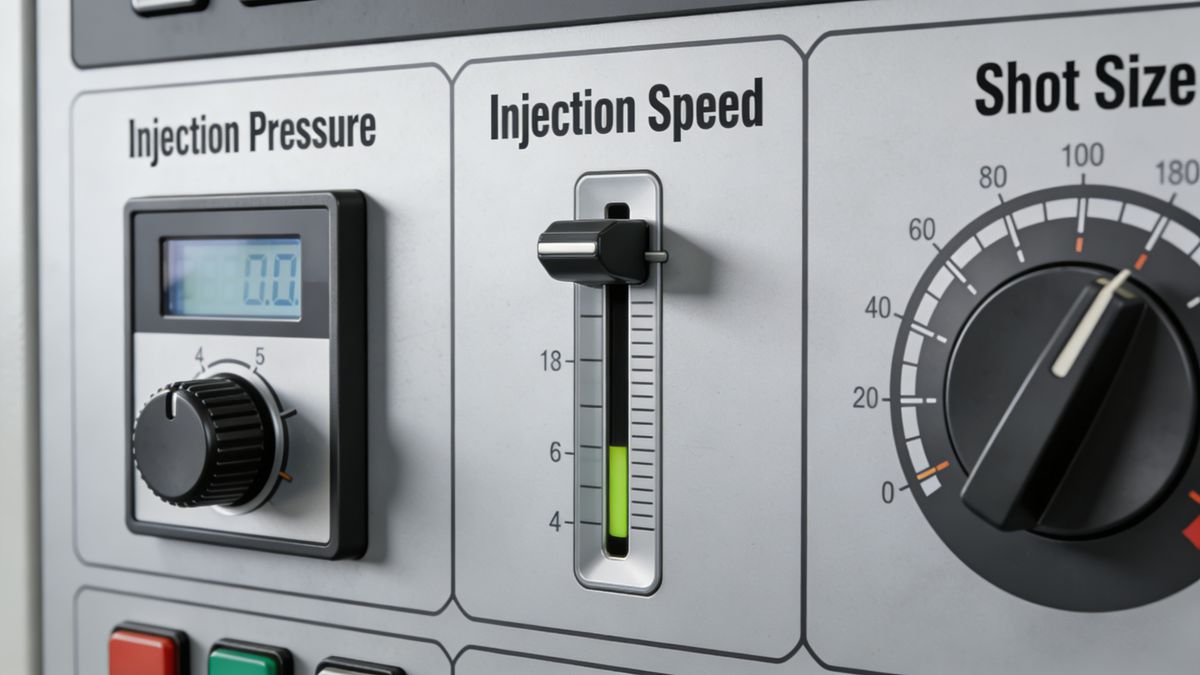
3. Einspritzdruck oder Geschwindigkeit zu niedrig
Die Schmelze benötigt eine ausreichende Antriebskraft, um durch den gesamten Hohlraum zu fließen, bevor sie abkühlt.
- Lösung: Erhöhen Sie den Einspritzdruck und die Geschwindigkeit. Dadurch wird sichergestellt, dass die Schmelze ausreichend Druck und Material (Zuschlag) erhält, bevor sie erstarrt.
4. Unzureichende Injektionszeit
Das Abfüllen eines bestimmten Gewichts an Material erfordert eine bestimmte Dauer. Wenn der Timer zu früh abbricht, ist der Schuss unvollständig.
- Lösung: Verlängern Sie die Einspritzzeit, bis die Kavität vollständig gefüllt ist. Überwachen Sie die Transferposition, um Konsistenz zu gewährleisten.
5. Unzulässiger Haltedruck1 (Umschaltpunkt)
Eine häufige Ursache ist das zu frühe Umschalten von Einspritz- auf Nachdruck. Wenn der Umschaltpunkt zu weit vorne liegt, bleibt zu viel Material übrig, das mit Nachdruck verpackt werden muss, was oft nicht ausreicht, um die Füllung zu beenden.
- Lösung: Stellen Sie die V/P (Velocity to Pressure) Umschaltpunkt in die optimale Position. Ziel ist es, 95-98% des Hohlraums durch Geschwindigkeit zu füllen und den Rest durch Druck zu verpacken.
6. Temperatur der Form zu niedrig2
Wenn die Teilegeometrie in ihrer Dicke stark variiert, kann eine kalte Form dazu führen, dass die Schmelze vorzeitig gefriert und einen übermäßigen Einspritzdruck verbraucht.
- Lösung: Erhöhen Sie die Formtemperatur oder konfigurieren Sie die Kühlwasserkanäle neu, um eine gleichmäßige Erwärmung zu gewährleisten, insbesondere bei dünnen Schnitten.
7. Schlechte Ausrichtung der Düse zur Angussbuchse3
Wenn die Maschinendüse nicht perfekt auf die Angussbuchse ausgerichtet ist, läuft das Material während des Einspritzens aus (tropft) und reduziert das tatsächliche Schussvolumen.
- Lösung: Richten Sie die Form neu aus oder justieren Sie die Position der Düse, um eine dichte Abdichtung zwischen der Düse und der Angussbuchse zu gewährleisten.
8. Beschädigte oder teilweise blockierte Düse4
Bei Vorgängen, bei denen sich der Schlitten zurückzieht (Rücksaugung), kann der wiederholte Aufprall zwischen der Düse und der Form die Düsenspitze verformen und den Fließkanal verengen. Dies erhöht die Scherwärme und kann dazu führen, dass kalte Butzen die Öffnung verstopfen.
- Lösung:
- Entfernen und reparieren oder reinigen Sie die Düse.
- Zurücksetzen der Düse vorwärts Endposition um die Aufprallkraft auf ein vernünftiges Maß zu reduzieren.
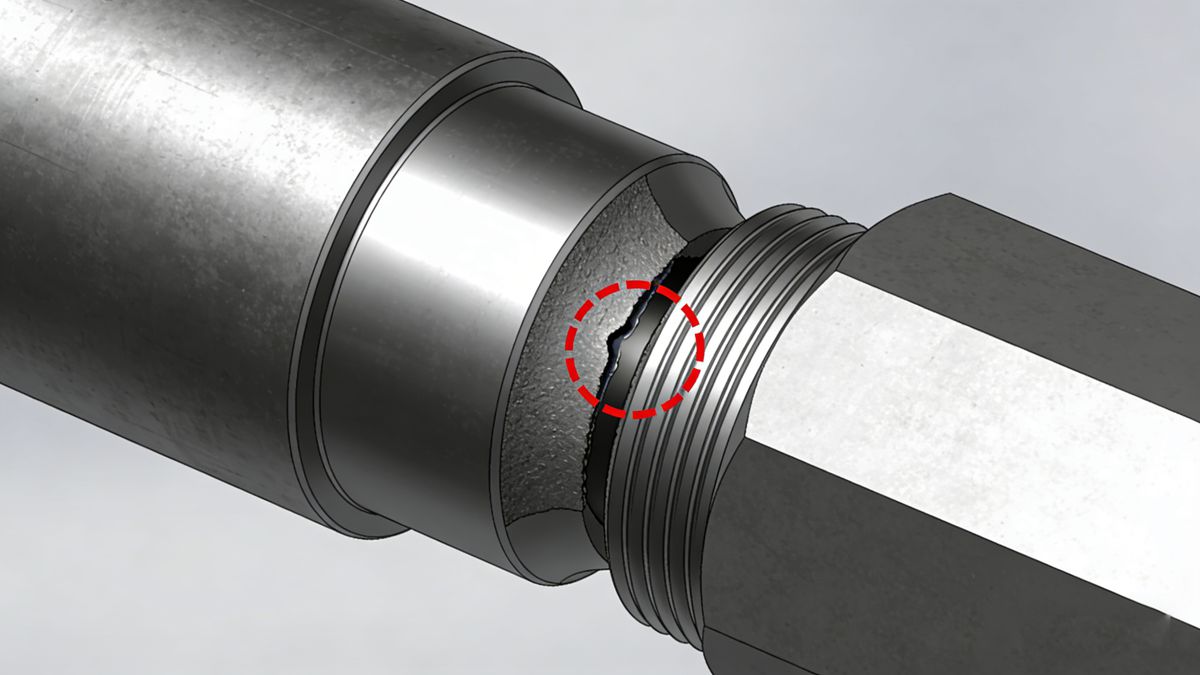
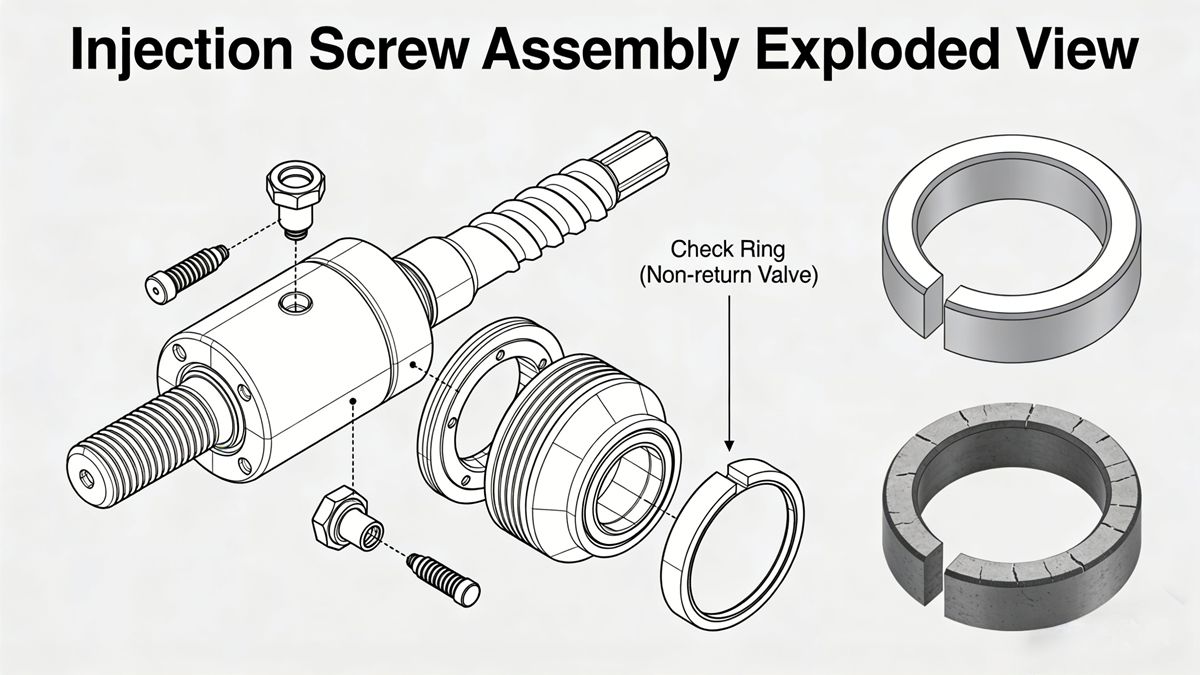
9. Abgenutzter Karo-Ring5 (Rückschlagventil)
Durch den Verschleiß des Rückschlagrings (Stoppring) und des Druckrings an der Schneckenspitze entsteht ein Spalt. Während des Einspritzens fließt der geschmolzene Kunststoff zurück (Leckage), anstatt sich vorwärts zu bewegen, was zu einem Verlust an Schussvolumen führt.
So überprüfen Sie die Abnutzung des Kontrollrings:
- Schließen Sie einen Injektionszyklus ab und wechseln Sie zu Manueller Modus.
- Stellen Sie den Einspritzdruck und die Geschwindigkeit auf niedrige Werte ein.
- Führen Sie einen Dosierhub (Erholungshub) durch.
- Führen Sie die Injektion manuell aus und beobachten Sie dabei die Anzeige der Schneckenposition.
- Beobachtung: Wenn sich die Schraube leicht und mit geringem Widerstand vorwärts bewegt, ist die Leckage schwerwiegend.
- Lösung: Wenn der Verschleiß erheblich ist, ersetzen Sie den Kontrollring sofort. Wenn Sie die Produktion mit einem verschlissenen Ring fortsetzen, ist die Qualität der Teile garantiert nicht konstant.
10. Schlechte Schimmelentlüftung
Eingeschlossene Luft in der Kavität wirkt wie eine Druckgasfeder, die die Schmelze daran hindert, das Ende des Fließwegs zu erreichen. Dies geschieht oft, wenn die Luft nicht schnell genug durch Trennlinien oder Auswerferstifte entweichen kann.
- Lösung:
- Fertigen Sie geeignete Entlüftungskanäle an den Stellen, an denen sich die Luftfalle auf der Trennlinie befindet.
- Wenn sich die Fallen nicht auf der Trennlinie befinden, modifizieren Sie vorhandene Muffen oder Auswerferstifte so, dass sie als interne Entlüftung dienen.
- Ziehen Sie in Erwägung, das Tor zu verlegen, um die Strömungsfront zu verändern und die Luft zu den vorhandenen Lüftungsöffnungen zu leiten.
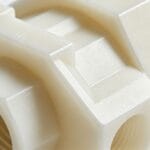
11. Rippen zu dünn oder zu tief
Tiefe, dünne Rippen sind klassische Lufteinschlüsse und Strömungshindernisse. Sie sind schwer zu befüllen, weil das Material in dem engen Kanal schnell abkühlt.
- Lösung:
- Erhöhen Sie die Dicke der Rippe (typischerweise 50-60% der Hauptwandstärke).
- Fügen Sie großzügige Radien an der Basis der Rippe hinzu, um den Fluss zu verbessern.
- Installieren Sie spezielle Entlüftungsmaßnahmen am Ende der Rippe.
12. Unausgewogenes Läufer- oder Torsystem
Einzelkavitätenformen sind in der Regel gut konstruiert, Mehrkavitäten-Formen leiden oft unter einem Ungleichgewicht der Strömung. Winzige Unterschiede in den Abmessungen der Angusskanäle oder der Anschnittgrößen können dazu führen, dass sich einige Kavitäten füllen, während andere zu kurz kommen.
- Lösung: Analysieren Sie die Durchflussbilanz. Möglicherweise müssen Sie die Anschnitte an den "leicht zu füllenden" Kavitäten manuell einschränken (indem Sie die Anschnittflächen anpassen) oder die Kufen bearbeiten, um eine gleichmäßige Verteilung des Durchflusses auf alle Kavitäten zu gewährleisten.
Fazit
Das Lösen von kurzen Schüssen erfordert einen systematischen Ansatz. Beginnen Sie mit der Überprüfung der einfachsten Maschinenparameter (Schussgröße, Temperatur, Druck), bevor Sie zu mechanischen Inspektionen (Kontrollringe, Düse) und schließlich zu Änderungen an der Form (Entlüftung, Angussbalance) übergehen. Durch die Anwendung dieser 12 bewährte Techniken, können Sie die Ausschussrate erheblich reduzieren und die Effizienz Ihres Spritzgusses verbessern.
Die Kenntnis des Nachdrucks kann Ihnen helfen, den Abfüllprozess zu optimieren und Fehler zu reduzieren. ↩
Erfahren Sie mehr über die Bedeutung der Werkzeugtemperatur für die Herstellung hochwertiger Spritzgussteile. ↩
Erfahren Sie, wie die richtige Ausrichtung der Düsen Materialverluste verhindern und das Schussvolumen verbessern kann. ↩
Das Erkennen von Düsenproblemen ist entscheidend für die Aufrechterhaltung einer gleichbleibenden Einspritzqualität. ↩
Wenn Sie die Rolle des Kontrollrings verstehen, können Sie das Schussvolumen und die Teilequalität aufrechterhalten. ↩