Inleiding
In the fast-paced world of plastic manufacturing, the difference between a defective part and a masterpiece often lies in the details. For injection molding process engineers1, mastering the fundamentals isn't just optional—it's critical for efficiency, quality, and cost-effectiveness.
Whether you are troubleshooting air bubbles, optimizing cycle times, or ensuring consistent melt viscosity, a deep understanding of the machinery and material behavior is key. In this comprehensive guide, we break down the 18 essential basics of injection molding that every professional must know to excel on the shop floor.
Nozzle Types and Configuration
The journey of molten plastic begins at the nozzle. While melt usually flows from the nozzle into the sprue bushing, some molds integrate the nozzle as part of the mold base, extending to the bottom.
There are two primary types:
- Open Nozzles: The industry standard for most production. They are cost-effective and minimize the risk of material stagnation.
- Closed Nozzles: Act as a check valve to prevent drooling, essential for low-viscosity materials or machines without decompression devices.
Pro Tip: Ensure the nozzle tip radius is 0.5mm smaller than the sprue bushing radius (a 1mm diameter difference) to facilitate easy sprue removal and prevent leakage.
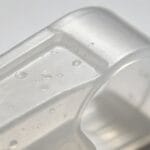
Filters and Combination Nozzles
Impurities can ruin an entire batch. Extension nozzles equipped with filters force molten plastic through narrow channels separated by inserts. This not only traps contaminants but also improves mixing.
For even better homogeneity, consider installing a static mixer between the barrel and the nozzle. These devices, often featuring stainless steel channels, separate and recombine the melt to ensure uniform consistency before injection.
Venting Strategies
Trapped gas is the enemy of surface finish. During plasticization, air, moisture, or monomeric gases can become compressed in the melt. If not released, they expand in the mold, causing bubbles or burns.
Venting Barrel Injection Molding Machines solve this by reducing the screw root diameter mid-barrel. This creates a pressure drop, allowing gases to escape through vent holes before the screw compresses the devolatilized melt again. Always ensure these machines are equipped with catalytic burners or scrubbers to handle potentially harmful exhaust gases safely.
The Role of Back Pressure
Quality melt requires consistent heat and mixing. Back pressure is the resistance applied to the screw during recovery.
- Benefits: Improves mixing, ensures thermal consistency, and removes air pockets.
- Trade-off: Higher tegendruk2 increases screw reset time and wear on the drive system.
Finding the sweet spot is crucial: enough pressure to homogenize the melt without causing excessive degradation or cycle time penalties.
Check Rings (Non-Return Valves)
Almost every screw tip features a check ring to prevent molten plastic from flowing backward over the screw during injection. While sliding nozzles exist, they are less common due to leakage risks.
Maintenance Alert: Check rings are wear items. Regular inspection is vital, as a worn check ring leads to inconsistent shot sizes and poor holding pressure control.
Screw Decompression (Suck Back)
To prevent drooling with open nozzles, many machines utilize a suck-back feature. Immediately after plasticizing, the hydraulic system pulls the screw back slightly, creating a vacuum at the nozzle tip to retract any dangling melt.
Caution: Minimize the suck-back distance. Pulling too much air into the nozzle can cause splay marks or voids in hygroscopic materials.
Screw Cushion (Pad)
A small amount of material should remain in the barrel after injection, known as the cushion or pad.
- Small Machines: ~3mm
- Large Machines: ~9mm
This cushion ensures effective pressure transmission during the holding phase. Modern machines can control this tolerance within 0.11mm. Consistency here is key to part dimensional stability.
Screw Rotation Speed
Screw speed directly impacts shear heat.
- High Speed: Increases friction/shear energy, improving plasticizing efficiency but risking uneven melt temperatures and material degradation.
- Large Screws: Should rotate slower than small screws because their surface speed generates significantly more shear heat at the same RPM.
Always adjust rotation speed based on the specific thermal sensitivity of the polymer being processed.
Shot Size Capacity
Injection machines are typically rated by their maximum shot size in Polystyreen (PS), measured in grams or ounces. Alternatively, some ratings are based on the theoretical volume of melt the injection unit can displace. Understanding your machine's capacity relative to your part weight is the first step in machine selection.
Plasticizing Capacity
While shot size tells you how much you can inject at once, plasticizing capacity3 tells you how fast the machine can melt material. It is defined as the pounds or kilograms of PS the machine can uniformly melt per hour.
Estimating Plasticizing Sufficiency
Can your machine keep up with your cycle time? Use this formula to verify:
$$t = frac{text{Total Shot Weight (g)} times 3600}{text{Plasticizing Rate (kg/h)} times 1000}$$
- $t$: Minimum possible cycle time.
- Rule: If your actual mold cycle time is lower than $t$, the machine cannot fully plasticize the material. This leads to inconsistent viscosity and part defects, especially in thin-wall or precision molding.
Residence Time in the Barrel
Thermal degradation is a function of temperature en time. Plastic left in a hot barrel for too long will decompose.
You can estimate actual residence time ($t$) with colored material trials or this rough calculation:
$$t = frac{text{Barrel Capacity (g)} times text{Cycle Time (s)}}{text{Shot Weight (g)} times 300}$$
Opmerking: Some materials may agglomerate in the barrel, increasing actual residence time beyond calculations.
Calculating and Managing Residence Time
Consistency is everything. Fluctuations in residence time lead to variations in melt quality.
- Too Short: Incomplete melting/poor mixing.
- Too Long: Material degradation/property loss.
Best Practice: Ensure consistent feedstock (granule size and shape) and monitor machine components for wear that might alter feeding or compression ratios.
Barrel Temperature Profiles
Barrel temperatures are guidelines, not absolute rules.
- Zone 1 (Feed Throat): Set to the lowest temperature to prevent premature melting and bridging.
- Compression/Metering Zones: Gradually increase to achieve melt.
- Nozzle Tip: Often set slightly lower to prevent drooling.
Always start with the manufacturer's recommended low settings and ramp up only as needed. Remember, the melt temperature is what matters, not just the heater band settings.
Measuring Melt Temperature
Never guess the melt temperature. Use a melt thermometer inserted directly into the air shot.
- Safety First: Molten plastic causes severe burns. Always wear heat-resistant gloves and face shields.
- Preparation: Pre-heat the thermometer probe to the expected temperature to avoid inaccurate readings.
Actual melt temp depends on screw speed, back pressure, and cycle time, not just barrel heaters.
Temperatuurregeling van de schimmel
Mold temperature dictates surface finish, shrinkage, and cycle time.
- Verification: Regularly check that the machine's actual running temperatures match the process sheet.
- Documentation: Record all temperature data at specified intervals. Deviations here are a leading cause of cosmetic defects.
Uniform Cooling Techniques
Parts must cool uniformly to prevent warpage and internal stress. Paradoxically, achieving uniform part cooling often requires non-uniform mold cooling.
- Strategy: Cool thick sections (cores) more aggressively with colder water, while using warmer water on thin sections or outer cavities.
- Application: Critical for large parts with long flow lengths or tight tolerance flatness requirements.
Routine Temperature and Cooling Audits
Reiterating the importance of monitoring: Establish a strict schedule to audit both barrel and mold temperatures.
- Check heater bands for failures.
- Verify water flow rates and temperatures in the mold.
- Log all data.
Temperature stability is the backbone of repeatable quality. If the numbers drift, the parts will too.
Conclusie
Mastering these 18 fundamentals provides a solid foundation for any injection molding process engineer. From optimizing screw dynamics to managing thermal profiles, each element plays a pivotal role in producing high-quality plastic components.
By applying these principles, you can reduce scrap rates, optimize cycle times, and ensure your manufacturing process runs smoothly and efficiently.
Are you facing specific challenges with your injection molding process? contact our team of experts for tailored solutions!