 日本語



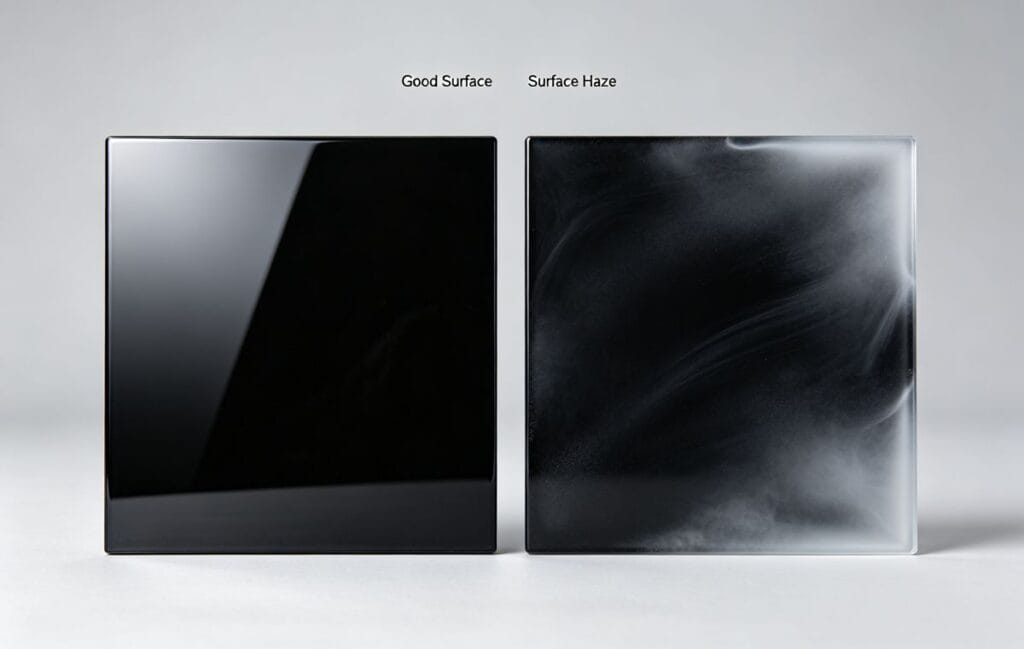
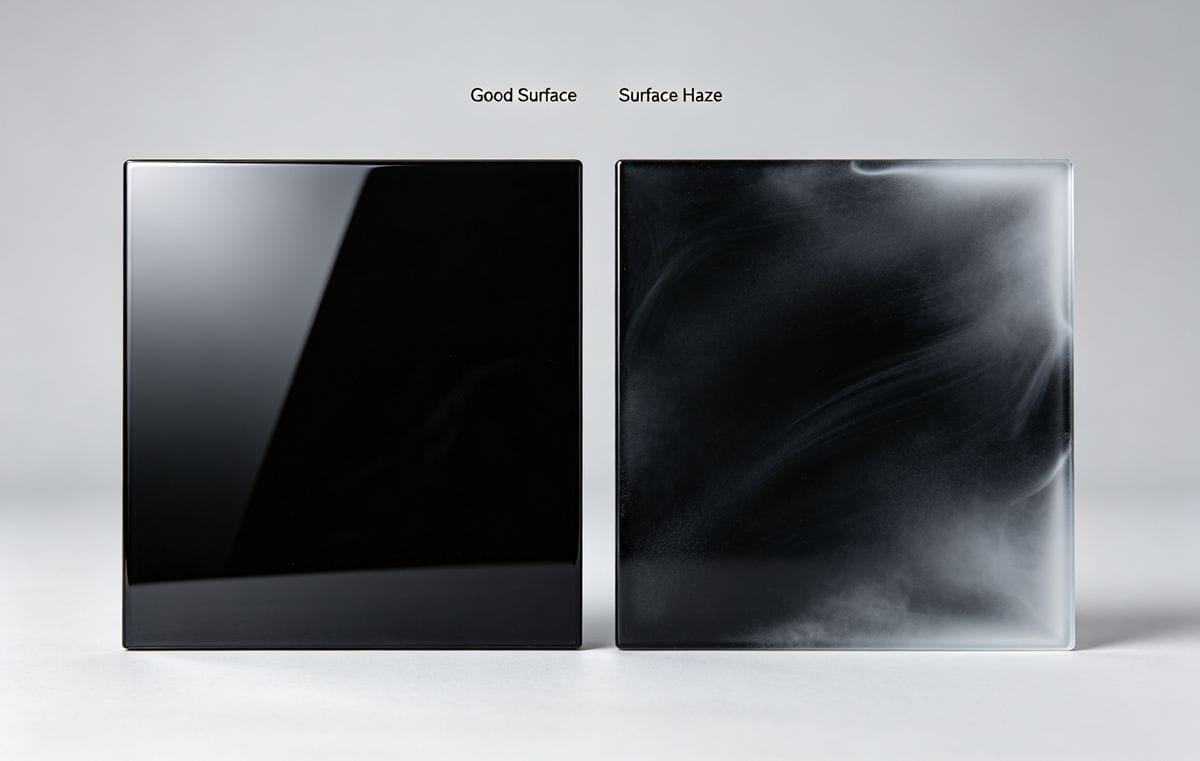
Surface haze (often appearing as white fog or cloud-like streaks) is a common aesthetic defect, especially visible on dark, high-gloss finishes. While it may be less noticeable on white products, it is highly prominent on black or dark-colored parts.
In PP (polypropylene) products, for example, this defect manifests as irregular white streaks or cloudy patches around the part's surface. In the industry, this is classified as surface haze caused by trapped gas. You can check our full overview of common gas-related molding flaws: 16 Common Injection Molding Defects: Root Causes & Solutions
The Science Behind the Haze: Gas Trapping Explained
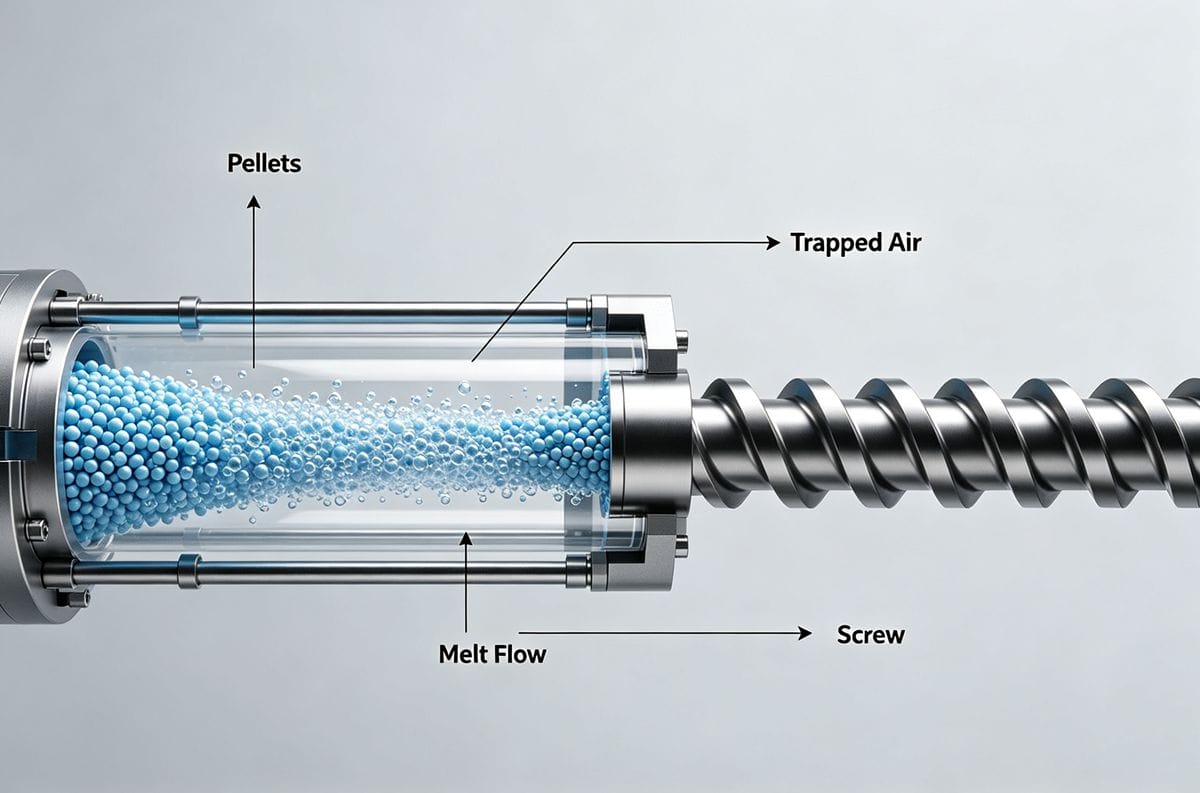
To fix the problem, we must understand the root cause. During the plastication phase, gaps exist between plastic pellets. As the screw rotates, it shears the material, transitioning it through three states:
- Glassy State
- High-Elastic State
- Viscous Flow State
This transformation happens in mere seconds. During this rapid process, the air trapped between pellets gets compressed into the melt. If this gas isn't properly vented from the barrel or the mold cavity, it gets injected into the part, causing gas trapping (haze) or, in severe cases, burn marks (diesel effect).
⚠️ Common Misconception: Many technicians believe that only burn marks indicate trapped gas, and their only solution is to add more venting. This is unscientific. Burn marks are simply the most extreme form of gas trapping, where compressed gas reaches temperatures of 600–800°C due to high pressure and speed, causing localized combustion. Haze is simply a milder form of the same issue. For more about venting failures that trigger haze and burns, check How Poor Venting and Mold Expansion Affect Plastic Parts.
How to Eliminate Surface Haze: Actionable Solutions
How do we ensure gas escapes without causing haze? The solution lies in balancing mold design and processing parameters.
1. Optimize Mold Venting (Don't Overdo It!)
Mold venting shouldn't be the only line of defense. PP has excellent flow properties and a wide processing temperature window. If venting slots are too large or poorly positioned, they won't help with haze and will instead cause flash defects. Precision is key.
2. Master Your Machine Parameters
Adjusting processing parameters is often the most effective way to eliminate haze. Here is how specific settings impact gas escape:
| パラメータ | Recommended Action | Why It Works |
|---|---|---|
| ねじの回転速度 | ⬇️ Decrease | Slower rotation reduces shear heat and prevents air from being folded into the melt. Fast speeds cause friction, leading to material degradation and gas generation. |
| 金型温度 | ⬆️ Increase | Higher mold temps keep the surface molten longer, allowing for slow-fill strategies without premature freezing (which causes short shots). |
| 射出速度 | ⬇️ Decrease | Slower injection gives compressed gas time to escape through vents. Fast injection compresses gas rapidly, increasing temperature and trapping it. |
| Clamping Force | ⬇️ Decrease (Slightly) | Lower clamping force slightly improves parting-line venting. Excessive force seals the cavity too tightly, blocking gas escape. |
Many other surface blemishes like gloss unevenness share root venting and parameter issues with haze; see our full breakdown: How to Solve Injection Molding Surface Defects Like Dark Spots, Gloss Differences, and Orange Peel

Key Takeaways for Injection Molders
- Haze is trapped gas: Treat it as a venting and gas-management issue, not just a cosmetic flaw.
- Burn marks are extreme haze: Both stem from the same root cause of compressed gas.
- Slow and steady wins: Lowering screw speed, injection speed, and slightly reducing clamp force are highly effective first steps.
- Vent smartly: Ensure mold vents are correctly sized and positioned to avoid flash while allowing gas to escape.
Did this guide help you troubleshoot your injection molding defects? Share your experiences or questions in the form below!
著者について

アレックス・ユー
アイデアル・プロ・マニュファクチャリング
アレックスはIdeal Proの共同創業者ですが、重要なプロジェクトの監督や技術チームの指揮をとっていないときは、長距離サイクリングを楽しんだり、街で一番おいしいコーヒーを探し回ったり、次の旅の計画を立てたりしている姿を見かけるでしょう。 国際貿易の営業やプロジェクト管理に20年以上の経験を持つ彼は、厳しい納期や厄介な技術的課題など、ありとあらゆる状況を経験してきました。彼は、素晴らしい仕事は十分な休息と一杯の美味しいコーヒーから生まれると信じており、その好奇心と細部へのこだわりを、手掛けるすべてのプロジェクトに注ぎ込んでいます。 オフィスにいないときは、たいてい屋外で、新しい場所を探索したり、皆と共有できるエピソードを集めたりしています。.

 English
 French
 Dutch
 German
 Japanese
 Korean