Ejection problems—often referred to as sticking, dragging, or poor demolding—are among the most critical "killers" in plastic injection molding . Whether the part sticks to the core, the cavity, or the runner system fails to separate, these defects can lead to production delays, damaged parts (warping, whitening, or cracking), and increased scrap rates.
If you are facing issues where the molded part refuses to eject cleanly, this guide will help you identify the root cause and apply the right solution. We will break down the troubleshooting process into Mold Design, Process Parameters, Materials, and Special Cases.
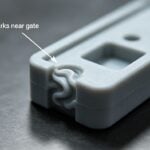
Quick Note: Forced ejection is never the answer. It often causes stress marks, deformation, or cracks. Always find the underlying cause first.
Mold Design & Maintenance Issues The majority of ejection failures stem from issues within the mold itself. Here is a checklist to inspect your tooling:
Surface Finish & Damage
- Rough Surfaces: If the cavity or runner has scratches, dents, or machining marks, the plastic will grip the steel. Polish the cavity surface to improve release. Ensure polishing marks follow the direction of demolding.
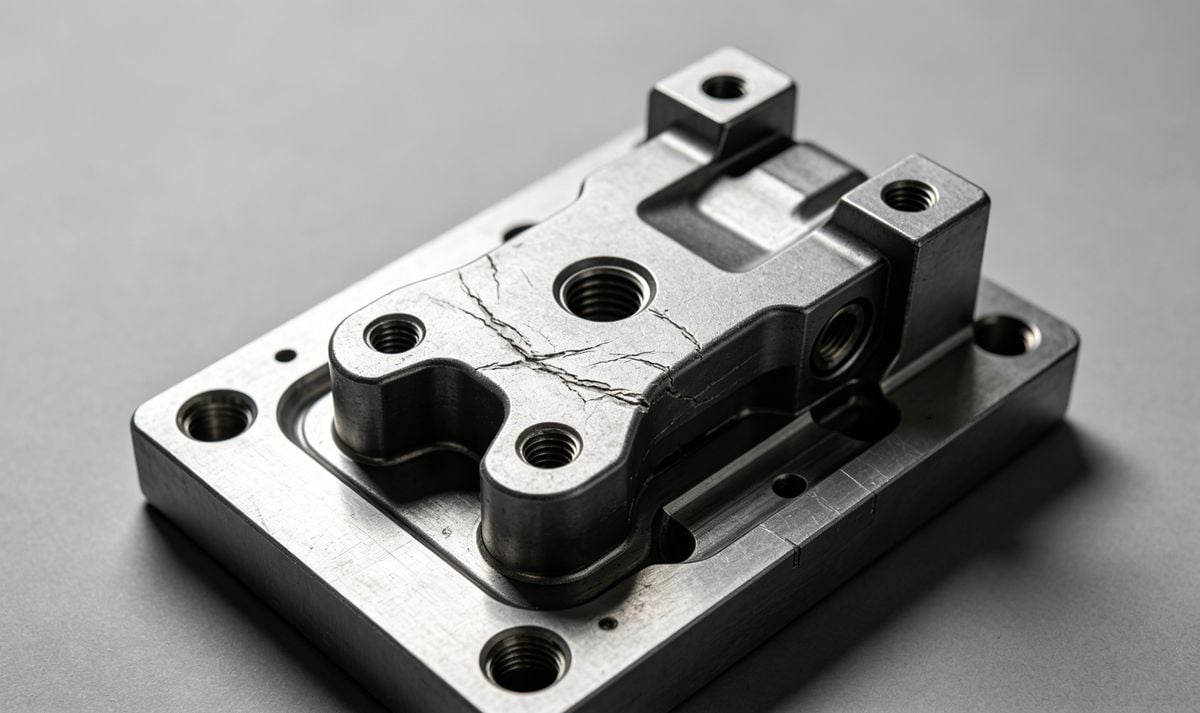
- Wear & Tears: Check for excessive clearance around inserts or worn-out areas that create flash (burrs), locking the part in place. Repair damaged sections immediately.
- Chrome Plating: For difficult materials, consider chrome plating the cavity to reduce friction.
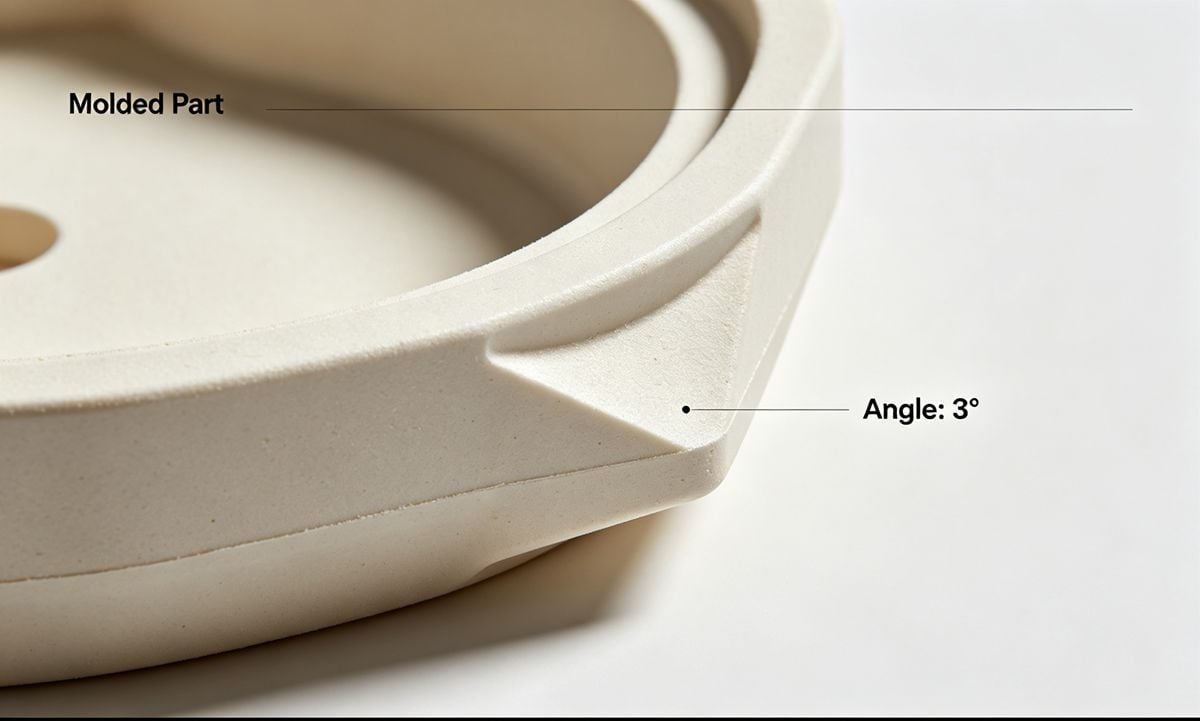
Draft Angles & Geometry
- Insufficient Draft: This is a classic cause. Without enough draft angle, a vacuum forms, and friction increases. Ensure a minimum draft of 0.5° to 1° per side. The deeper the part, the more draft required.
- Undercuts: Check for accidental undercuts or sharp corners in the design that physically lock the part.
Ejection System Balance
- Unbalanced Ejection: If ejector pins are unevenly distributed or the stroke is insufficient, the part may tilt or stick. Increase the number of ejector pins or use a stripper plate for better balance.
- Guide Pins & Bushings: Ensure the ejector plate moves smoothly. Binding due to lack of lubrication or misalignment can stop the ejection sequence.
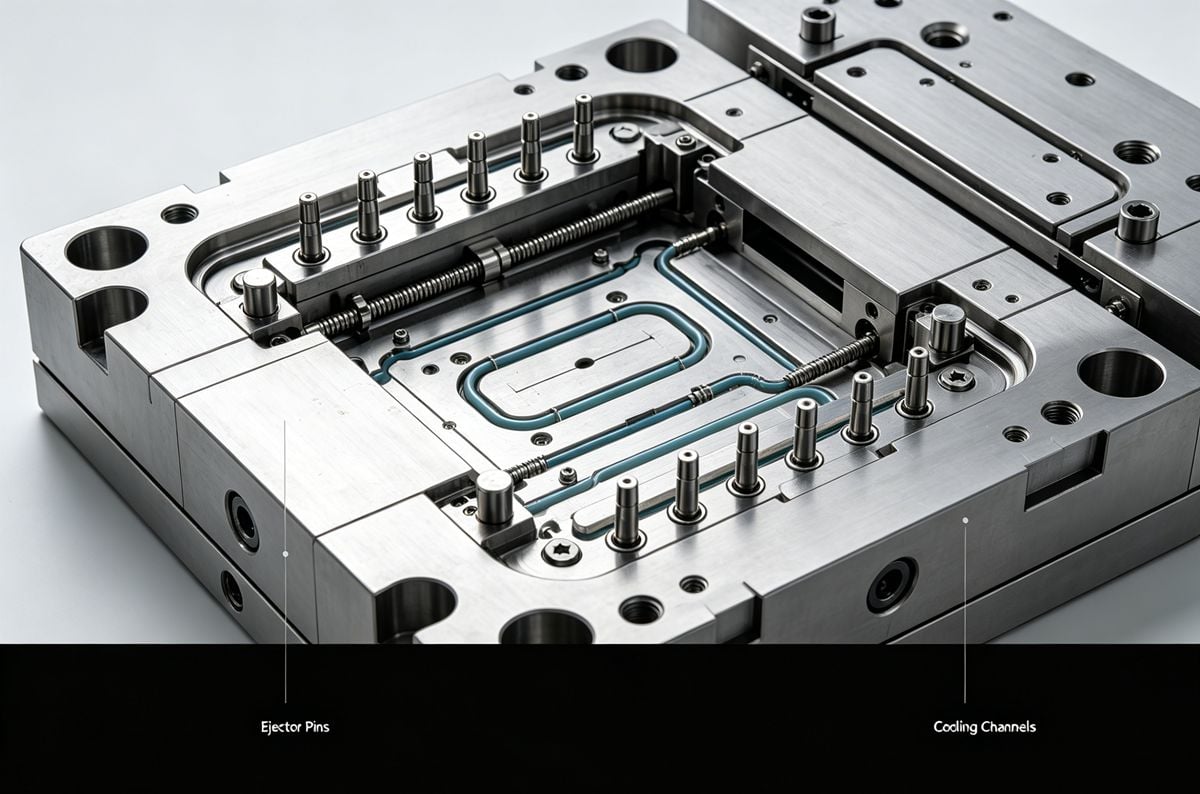
Venting & Cooling
- Vacuum Effect: Poor venting creates a vacuum behind the part as it ejects. Add venting slots or air poppets (especially in deep cores) to break the vacuum.
- Cooling Efficiency: If the part isn't cooled enough, it remains soft and shrinks onto the core tightly. Conversely, if the mold temperature is too high on the wrong side, the part may stick to the stationary half.
Runner System Design
- Sprue Size: The sprue should be large enough so it doesn't freeze prematurely but designed to pull out cleanly.
- Cold Slug Well: Ensure a cold slug well is present to trap the initial frozen material.
- Nozzle Fit: The radius of the sprue bushing should be slightly larger (1-2mm) than the nozzle radius to prevent material trapping at the interface.
Process Parameter Adjustments
Sometimes the mold is fine, but the machine settings are causing the issue.
| Parameter | Issue | Recommended Adjustment |
|---|---|---|
| Injection Pressure | Too high pressure packs the melt too tightly. | Decrease injection and holding pressure. |
| Cycle Time | Insufficient cooling makes the part too soft. | Increase cooling time. |
| Temperatures | Melt or mold temp too high/low. | Optimize barrel temps. Lower mold temp on the sticking side. |
| Injection Speed | High speed can trap air or over-pack. | Reduce injection speed. |
Tip: Over-packing (filling the mold beyond 100%) significantly increases ejection force. Switch to a scientific molding approach to determine the optimal switchover point.
Material Selection & Preparation
The raw material plays a surprising role in how easily a part releases.
- Contamination: Foreign particles or mixed grades of resin can alter shrinkage rates and cause sticking. Ensure strict material handling protocols.
- Lubricity: Some resins are naturally "stickier." You may need to add internal lubricants (like zinc stearate) or external mold release agents.
- Particle Size: Inconsistent pellet size can lead to uneven melting and filling.
Using Mold Release Agents Correctly
Mold release agents reduce the adhesion between the plastic and the steel. However, they must be used correctly:
- Temperature Limits: Match the agent to your process. Fatty oils work below 150°C, while PTFE-based sprays can withstand over 260°C.
- Application: Spray-on agents provide a more uniform film than paste/wax applications, which can leave streak marks on the cosmetic surface.
- Warning: Relying heavily on release agents is often a "band-aid" solution. It is better to fix the mold or process first.
Special Case: Part Sticking to the Stationary Mold (Fixed Half)
A common nightmare is when the part stays on the nozzle side (stationary half) instead of moving with the ejector side (moving half).
Causes & Fixes:
- Nozzle Radius Mismatch: If the nozzle radius is larger than the sprue bushing radius, it creates a mechanical lock. Ensure $R{nozzle} < R{bushing}$.
- Misalignment: The nozzle and sprue bushing are not concentric. Re-align the mold during setup.
- Surface Texture: The stationary side might be polished too highly compared to the moving side. Intentionally roughen the moving side (core) slightly to encourage the part to stay there.
- Z-Puller: Install a Z-type pull pin or reverse taper to mechanically force the part off the stationary side.
Summary Checklist
If you encounter ejection problems, follow this order of operations:
- Check Process: Lower pressure, increase cooling time.
- Inspect Mold: Look for damage, check draft angles, and clean vents.
- Review Material: Check for contamination or moisture.
- Use Releases: Apply mold release spray temporarily while investigating.
By systematically addressing these factors, you can eliminate ejection defects, improve cycle times, and ensure high-quality production.